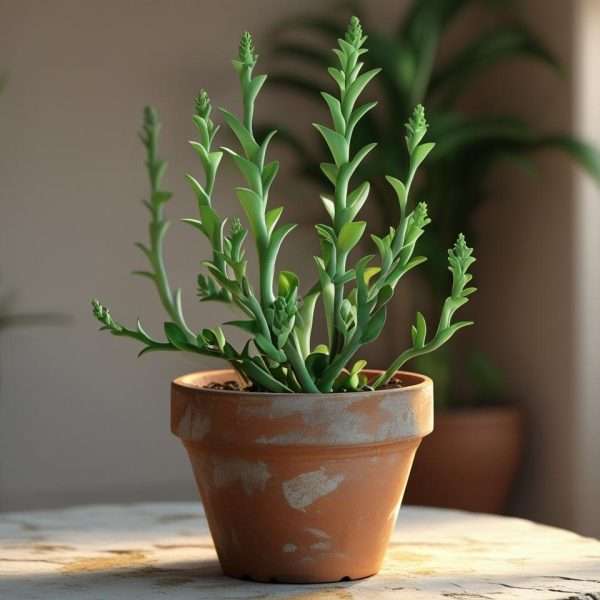
Queens Tears plant (Billbergia nutans), a member of the bromeliad family, is a striking and low-maintenance houseplant prized for its cascading leaves and unusual, colorful flowers.
Native to South America, this epiphytic plant has adapted well to indoor environments, making it a popular choice for plant enthusiasts, especially those with limited space.

Its ability to thrive in bright, indirect light and tolerate some neglect makes it ideal for apartments and indoor gardens. However, to encourage healthy growth and blooming, Queens Tears plant requires specific care regarding light, watering, humidity, and potting conditions.

Quick-Reference Care Checklist:
- Light: Bright, indirect light (good near an east or west window); avoid harsh midday sun that can scorch the leaves. In low-light apartments, supplement with LED grow lights (10–12 hours daily) or reflect light with mirrors.
- Water: Keep the central cup (“cup” formed by the leaf rosette) half-filled with fresh water, refreshing it regularly.
Water the potting mix only enough to stay lightly moist, letting the top inch dry between waterings. Use room-temperature rainwater or filtered water to avoid chlorine and fluoride. - Humidity: Prefers moderate to high humidity (around 40–60%). Brown leaf tips often mean the air is too dry. Mist the plant occasionally or use a humidity tray/humidifier to keep air moist. Grouping it with other houseplants can also raise humidity.
- Temperature: Enjoys normal room temperatures. Aim for 65–80°F (18–27°C) in warmer months and 60–75°F (16–24°C) in cooler months. Avoid cold drafts and sudden temperature drops; night temperatures below ~60°F (15°C) can stress it.
- Soil & Pot: A very well-draining mix is essential. Use a bromeliad or orchid mix, or a chunky mix (e.g. one-part potting soil to two parts bark/perlite).
Because Queen’s Tears has a small root system, a shallow pot (around 4–5 inches wide) is fine. Choose a stable, heavy pot (clay is ideal) to prevent tipping. Ensure there’s a drainage hole. - Fertilizer: Feed with a balanced, water-soluble fertilizer diluted to half strength about every 2 weeks during spring and summer (active growth season).
In fall and winter, cut back to once a month. You can pour diluted fertilizer into the central cup or use a foliar spray occasionally. (Many growers add a pinch of Epsom salts in spring to boost blooming.) - Flowering: Queen’s Tears usually blooms in spring when it’s mature (around 2–3 years old). Its dangling, colorful flowers last only 1–2 weeks.
To encourage blooming, give it very bright light and a slightly drier rest in winter (lowering temperatures a bit). Some growers use tricks like enclosing the plant with ripening apples (ethylene gas) or adding Epsom salt to trigger flower buds. - Troubleshooting: Yellow leaves usually indicate watering issues (overwatering leads to root rot; underwatering causes limp yellow foliage). Brown leaf tips often mean dry air, while dark spots or scorch marks suggest too much direct sun.
Drooping leaves can be a sign of water or light stress – check that you’re not over/under-watering and that the plant has bright enough light. Inspect regularly for pests:
Mealybugs (white fuzzy patches) and scale insects (small brown bumps) are common; isolate and treat infected plants promptly. - Propagation: After the plant blooms, it produces offsets (“pups”) at its base. Remove these when they are at least ~4–6 inches tall and have begun to sprout their own roots.
Twist or cut each pup from the parent (using a clean knife), pot it in its own small container with the same airy mix, and keep it humid and bright but not in full sun.
Queens Tears Plant Ideal Lighting Conditions

Queen’s Tears thrives in bright, indirect light. It can grow near a sunny window, but protect it from direct noon sun (especially through glass), which can burn the leaves.
Your houseplant is dying right now — and you have no idea why.
Stop killing your houseplants.
The fix takes 60 seconds.
Snap a photo. LetPlant AI instantly diagnoses what’s wrong, tells you exactly when to water, and alerts you before it’s too late — not after.
FREE Save my houseplants nowNo credit card. No catch. Just healthier houseplants.
A north- or east-facing window is often perfect: the plant will still get strong light without the intense heat. In low-light apartments (e.g. rooms with only small windows or northern exposure), you may need to supplement.
LED grow lights or full-spectrum fluorescent bulbs can help – aim for about 10–12 hours of bright light per day.
If the plant is too far from light, it will stretch and produce fewer leaves or flowers. If you notice pale or elongated leaves, try moving it a bit closer to light or using a lamp.
A practical space-saving trick is to hang the Queen’s Tears in a basket near a window or high shelf: it shows off the cascading leaves and keeps it out of the way on the floor or tabletop. Just be sure the hanging spot still gets plenty of light.

Tip: Rotate the plant a quarter-turn every few weeks so all sides get light. If any leaves do start to brown or curl tightly, it’s usually a sign of too much sun or heat – move it to a shadier spot or pull the curtains during the hottest part of the day.
Queens Tears Plant Watering Schedule and Methods

Watering Queens Tears Plant is all about balance. Its natural home is humid forests, where it catches rain in its leaf cup, so indoors you’ll mimic that. Keep the central cup (rosette) half-filled with fresh water most of the time.
Use filtered or rainwater if you can – this species is sensitive to the chemicals in hard tap water. Every week or two (more in summer, less in winter), dump out any old water from the cup and refill with clean water to prevent stagnation.
For the potting soil, water only when the top ~1 inch feels dry. When you do water, pour it around the edges and let it soak in – don’t flood the pot or leave the plant sitting in water.
The goal is to keep the soil barely moist, not soggy. If you water too frequently, roots will rot; too infrequently, the plant will wilt.
A good rule is watering about once every 1–2 weeks indoors, adjusting for your climate and the season. In summer or dry heat, you might water a bit more; in cool winter with low light, cut back. Always let excess water drain away.

Small-space tip: Use a saucer or tray with pebbles under the pot and add a little water to the tray (without letting the pot sit directly in water). This raises humidity around the plant as the water evaporates, benefiting the plant without requiring extra floor space.
Humidity and Temperature Requirements

Queens Tears Plant is fairly forgiving about humidity but does appreciate moist air. Aim for 40–60% humidity or higher. If your apartment’s air is very dry (common with winter heating or AC), mist the plant’s leaves once every few days or use a small humidifier nearby.
In a pinch, clustering it with other tropical plants or placing it on a moist pebble tray (as above) helps keep the local humidity up. Brown, crispy tips on leaves are a classic sign of low humidity, so watch for those and increase moisture if needed.
As for temperature, Queen’s Tears prefers warm conditions. It does best between 65–80°F (18–27°C) in spring and summer, and can tolerate 60–75°F (16–24°C) in fall and winter.

It can survive short dips as low as ~50–55°F (10–13°C), but prolonged cold (below ~60°F) will stress it and may stunt blooming. Keep it away from cold drafts or the chill of an unheated room.
Similarly, avoid placing it right next to radiators or vents. A stable, warm environment is key – aim to keep your home in a comfortable range all year round.
Tip: If you want the plant to bloom, some growers simulate a mild “winter” rest by dropping temperatures a bit (and watering less) in winter. Even a few degrees cooler at night can help trigger flowering in spring.
Queens Tears Plant Soil Type and Potting Instructions

Use a very well-draining potting mix. Queens Tears Plant is an epiphytic bromeliad, so its roots like lots of air and excellent drainage. A commercial orchid or bromeliad mix is ideal.
Alternatively, make your own chunky mix: for example, one part regular potting soil to two parts coarse material (perlite, orchid bark, or coconut husk). The mix should hold some moisture but never stay soggy.
Plant your Queen’s Tears in a pot only slightly larger than the rootball. A 4–6 inch diameter pot is usually sufficient, even for a mature plant. Because these plants have shallow, not extensive roots, huge pots aren’t needed.
In fact, smaller pots dry out more evenly. Just be sure the pot has a drainage hole. Heavy clay or ceramic pots are good choices because they are sturdy and keep the plant from toppling under its own weight as it grows.
When potting, gently tease out the roots and bury the plant at the same depth it was in its old pot. You don’t need to bury it deep – bromeliads often sit near the soil surface. Fill around with mix, firm lightly, and water in. After that, only water as described above.
If the plant seems rootbound or the mix breaks down (every 2–3 years), repot in spring into a fresh batch of mix.
Repot carefully, as Queen’s Tears does not like having its roots disturbed more than necessary. You can also use repotting time to tidy up: remove any dead leaves and separate any crowded clumps.

Small-space tip: For very tight quarters, consider a hanging pot or pocket planter. Billbergia’s elegant, fountain-like leaves drape down nicely, making it great for hanging display.
This saves floor/shelf space and gives the plant room to cascade without crowding your desk or nightstand.
Queens Tears Plant Fertilization Routine

Feed your Queens Tears Plant moderately. During the growing season (spring and summer), fertilize about every 2–4 weeks. Use a balanced liquid fertilizer (e.g. 10-10-10 NPK) at half the strength recommended on the label.
Apply it to the soil or add a little to the water you pour into the central cup. Bromeliads also absorb nutrients through their leaves, so you can mist with fertilizer or pour some into the cup as well.
In the cooler months, cut back feeding to once a month or less, since growth naturally slows. Avoid getting fertilizer residue on the leaves. Be especially gentle if using foliar feeding – a mild solution and occasional feeding (once or twice per month) is plenty.
As a special tip, many growers add a pinch of Epsom salt (magnesium sulfate) to the fertilizer mix once in early spring to encourage blooming. (Magnesium is often a limiting nutrient for bloom production.)
Another flower-boosting trick is simply providing very consistent care – as the plant matures, it will bloom if conditions are right.
Flowering Cycle & Encouraging Blooms

Queens Tears Plant is prized for its unusual pendant flowers and nectar drips. It typically blooms in spring, once the plant is mature (often around 2–3 years old).
The blooming period is short – the colorful tubular flowers (pink, blue, green, etc., with bright bracts) last only about 1–2 weeks.
After blooming, it’s normal for the main rosette to gradually die back; in nature, bromeliads often put all their energy into the blooms and seeds, then make pups before the mother plant fades.
To help your indoor plant flower well:
- Maximize light
 Bright light is the single most important factor. If your plant hasn’t flowered in a couple of years, try moving it to a brighter spot (or outdoors to filtered light in summer).
 - Simulate seasons
 In fall and winter, give it slightly cooler nights (around 60°F/15°C) and reduce watering. This mild “rest” period mimics its native climate and can trigger spring blooms.
 - Patience

If your plant is young (under 2 years), it may simply be too immature to bloom. Focus on steady care, and it should bloom when ready. - Natural boosters
 Some people enclose the plant (carefully) with ripening apples in a bag for 1–2 weeks. The ethylene gas released by the apples can induce flower buds.
Use this method only briefly and keep the plant out of direct sun while bagged to avoid heat stress. - Nutrients
Ensure it’s not starved – fertilize as above, and consider that Epsom salt boost
Remember that not all indoor specimens bloom profusely. Even without flowers, Queen’s Tears is an attractive foliage plant. But with good light, moderate feeding, and a bit of seasonal variation, many indoor growers are rewarded with its dramatic blooms.
Troubleshooting Common Issues
Even beginners can keep Queen’s Tears happy by watching for a few key signs and acting quickly:
- Yellow or pale leaves
 Often caused by overwatering (leading to root rot) or by under-watering. Check the soil and cup.
If the soil is very wet and leaves turn yellow and droop, reduce watering frequency and ensure good drainage. If the soil is bone-dry and leaves are limp, increase watering. Remember: soggy soil = rot; bone dry = dehydration. - Brown leaf tips
 This usually means the air is too dry. Increase humidity (mist, humidifier, pebble tray) and avoid letting the plant sit next to hot dry air (like near a heater vent).
A little browning at the very tips is common in dry indoor air, but widespread browning indicates more moisture is needed. - Leaf spots or scorch marks:
 Small dry brown spots or translucent burn marks often come from too much direct sun. Move the plant further back from the window or use a sheer curtain to filter intense rays.
On the other hand, unusual spotting or mushy soft patches on the leaves could be fungal or sunburn damage. Remove any badly affected leaves. - Drooping leaves
 If the entire rosette droops or wilts, review light and watering. Underwatered plants get wrinkled, floppy leaves; overwatered ones get limp, soggy bases.
Also check temperature – extreme heat can droop leaves as well. Adjust care to find the happy medium. - Pests
 Check for mealybugs (white cottony blobs) and scale (small brown/gray bumps) on the leaves and in leaf axils. These sap-suckers can weaken the plant and invite disease.
If found, isolate the plant and treat immediately with a cotton swab dipped in rubbing alcohol or insecticidal soap, removing bugs by hand if possible. Keep monitoring after treatment to catch stragglers.
Note: It’s natural for Queen’s Tears to drop its oldest few leaves at the bottom; don’t panic if 1–2 lower leaves yellow and fall off.
This is normal renewal. Just snip them off to keep the plant tidy. Watch instead for new growth at the center and at the base (pups) – that’s a sign your plant is healthy and happy.
Queens Tears Plant Propagation Methods (Offsets)
Queens Tears plant is easy to propagate via its offsets (pups). After a bloom, the mother plant will produce 1–3 pups at its base. When these pups are a good size (at least 4–6 inches tall and showing real root development), you can remove and root them.
Steps to propagate:
- Timing

Wait until after flowering and once a pup is large enough (with several leaves). Very small pups usually fail. Spring or early summer is ideal. - Removal

Gently pull the pup aside to expose where it meets the parent. Using a clean, sharp knife or shears, cut or twist it away at the base. Try to take any little roots it has. Be careful not to damage the main plant too much. - Potting up

Plant the pup in its own small pot filled with the same airy mix you use for mature plants. It may sit high; you only need to bury the base shallowly. If it’s floppy, you can use a small stake to keep it upright until it roots. - Aftercare: Treat the new plant like a baby – keep it in bright, indirect light, warm, and moderately humid.
Water lightly: mist the leaves and lightly moisten the soil or cup without saturating. In about 2 months, it should root and start growing more vigorously. Then you can care for it as a full plant.
Division: If you have a large clump (several rosettes in one pot), you can also separate the clump into two or more pieces, ensuring each section has a healthy rosette and some roots. Repot these divisions similarly.
CONCLUSION
Caring for Queens Tears Plant indoors takes some attention, but it rewards you with its elegant foliage and occasional dramatic blooms. By providing bright light, moderate watering, warm humid air, and periodic feeding (and using the tricks above for apartment growers), even beginners can successfully grow this beautiful bromeliad in small spaces