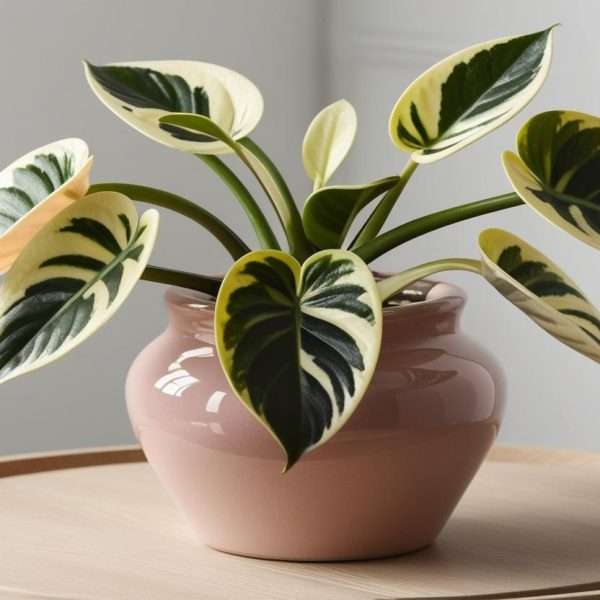
The false aralia Plant is a tropical evergreen prized as a houseplant for its unique, wispy foliage and elegant form.
Native to the South Pacific (New Caledonia) and a member of the Araliaceae family, this plant is known botanically by several names – you might find it labeled as Schefflera elegantissima, Dizygotheca elegantissima, or Plerandra elegantissima.
It also goes by common names like spider aralia, threadleaf aralia, or finger aralia due to its long, narrow leaves that radiate like spokes from each stem.

These leaves emerge a copper-red color when young and mature to a deep green (almost black) with toothed edges, giving the plant a dramatic, textured look.
False aralia typically grows as a slender, upright shrub or small tree; indoors it can reach about 1.5–2 meters (5–7 feet) tall over many years, though its growth is slow and steady.
Why it’s popular.

False aralia’s delicate, feathery appearance and tall, airy growth habit make it a striking accent in any indoor space. Younger plants are perfect for tabletops or desks, while older specimens develop woody stems and can serve as graceful indoor trees for corners or as living screens.
Your houseplant is dying right now — and you have no idea why.
Stop killing your houseplants.
The fix takes 60 seconds.
Snap a photo. LetPlant AI instantly diagnoses what’s wrong, tells you exactly when to water, and alerts you before it’s too late — not after.
FREE Save my houseplants nowNo credit card. No catch. Just healthier houseplants.
Its sculptural form softens interiors and complements broader-leaved plants. False aralia is also appreciated for being relatively low-maintenance (when its basic needs are met) and for tolerating typical home conditions.
However, it can be a bit sensitive to changes, often dropping leaves if stressed – so consistent care is key. In the following sections, we’ll cover all aspects of indoor care, from light and water to troubleshooting problems, so you can confidently help your false aralia thrive.
Light Requirements

Provide bright, indirect light. False aralia does best with plenty of light, but not harsh direct sun. An ideal spot is near a window with filtered sunlight or gentle morning/evening sun. Bright indirect light will keep the foliage lush and growth vigorous.
In fact, the intensity of light can even affect the leaf color – with more light, mature leaves tend to be darker and fuller.
Avoid placing the plant in strong midday sun (such as a south-facing window without a sheer curtain), as the delicate leaves can scorch and turn brown from too much direct light.
Signs of too much light include leaves developing brown or black patches, especially at the edges, indicating sunburn. If you see this, move your plant a bit further from the window or provide some curtain shade.
On the other hand, false aralia can tolerate medium light levels if necessary – it will survive in a somewhat dimmer spot, but expect slower, sparser growth. In low light, the plant may become “leggy” (stretched, with more distance between leaves) as it reaches for light.
If yours looks thin or sparse, gradually move it to a brighter location. A north or east-facing window is often ideal: it provides bright light without too many harsh rays.
Rotating the plant every week or two can also ensure all sides receive light evenly and prevent it from leaning toward the light source. In summary, bright, indirect light for most of the day is optimal to keep your false aralia looking its best.
Watering Needs and Schedule

Water moderately and avoid overwatering. False aralia likes a steady supply of moisture, but it’s crucial to strike a balance – the plant does not enjoy sitting in waterlogged soil. A simple rule is to water when the top inch or two of the soil has dried out.
Use your finger to check the soil moisture; if it feels dry at the surface, it’s time to water. When watering, give the plant a thorough drink until water flows out of the drainage holes, ensuring all the roots get moisture.
Then always discard any excess water that collects in the saucer after about 10-15 minutes. This prevents the roots from standing in water, which can lead to root rot.
False aralia’s fine roots are somewhat sensitive to overwatering – it prefers to be slightly too dry than too wet in general. Consistently soggy soil can cause yellowing leaves and a wilting or rotting plant base.
After watering thoroughly, allow the top portion of soil to dry out again before the next watering. In practice, this often means watering about once a week under typical home conditions.
However, always adjust to your environment: in a warm, bright room the soil will dry faster (watering might be needed a bit more frequently), whereas in a cooler or lower-light spot it will stay moist longer (watering less often).
In winter, growth slows and the plant uses water more slowly, so you may find you only need to water every 10–14 days.
Let the soil dry a bit more between winter waterings, but do not allow it to dry out completely into a bone-dry mass – some moisture should remain around the roots even in the rest period. If a false aralia is severely underwatered, it will let you know by drooping its leaves dramatically.
Fortunately, a good soak will often perk it back up within a day. Keep an eye on your plant and adjust your schedule as needed.
Tips for watering.

Use room-temperature water (false aralia can be sensitive to very cold water on its roots) and, if possible, use filtered or “aged” water.
They prefer water that is low in lime (less mineral-heavy), since high mineral content over time can lead to leaf discoloration or build-up in the soil. Rainwater or distilled water is great if you have it, but not mandatory.
An occasional method false aralias enjoy is bottom watering – setting the pot in a tray of water and letting it soak up moisture from the drainage holes for 15-20 minutes. This ensures an even watering and encourages roots to grow downward.
Just be sure to drain any leftover water afterward. By keeping the soil lightly moist but never waterlogged, your false aralia will stay healthy and avoid the common pitfalls of yellow leaves or root disease related to improper watering.
Soil Preferences and Potting Tips

Use a well-draining, rich potting mix. In nature, false aralia grows in forest conditions with loose, organic-rich soil. For container growth, a high-quality peat-based potting mix works well, as it retains some moisture but still drains excess water.
The soil should be moist but well-draining – you want it to hold humidity around the roots without becoming a soggy sponge. A slightly acidic to neutral pH is ideal (around 6.0 is great).
Most general houseplant or tropical plant potting mixes will suffice, but you can improve them by adding perlite, coarse sand, or pine bark to increase aeration and drainage. This prevents the mix from compacting tightly and allows oxygen to reach the roots.
False aralia does not do well in heavy, clay-like soils or straight garden soil in a pot – those can hold too much water.
Always ensure your potting mix is lightweight and fast-draining; if water tends to sit on the surface or the mix stays damp for many days, consider adding more drainage material.
When potting or repotting, it’s wise to create a drainage layer at the bottom of the pot if your mix needs extra help draining. You can place a thin layer of gravel, clay pebbles, or broken pottery at the pot’s base to prevent waterlogging at the roots.
Make sure the container itself has drainage holes – false aralia’s roots will quickly suffer in a pot with no drainage.
As for the type of soil: a mix labeled for indoor foliage plants or a DIY blend of something like peat moss + perlite + a bit of compost or bark would give a nice balance of moisture retention and drainage.
Some growers even mix in about 1/3 coarse sand to their potting mix for this plant, to mimic its airy native soil and further improve drainage.
Potting tips

Choose a pot that is proportionate to the root ball size. False aralia actually likes being a bit snug in its pot and doesn’t require a ton of extra space. A container that is just 1–2 inches (a few cm) wider in diameter than the current root ball is sufficient.
Avoid putting a small plant into a very large pot with lots of extra soil, as this excess soil can hold too much water and invite root rot. Unglazed terracotta pots can be a good choice because they allow moisture to evaporate through the walls, helping the soil dry out evenly.
Plastic or ceramic pots are fine too – just be even more careful with watering since they hold water longer. When planting, set the root ball at the same depth it was in the previous pot (false aralia doesn’t like being planted too deeply on the stem).
After potting, gently firm the soil and give it a good initial watering. Because the plant is somewhat sensitive to disturbance, try not to rough up the roots too much when repotting.
If the soil is well-aerated and drains well, your false aralia’s roots will be happy and healthy, supporting lush growth above.
Temperature and Humidity

Keep it warm and humid. As a tropical plant, false aralia thrives in warm, stable temperatures and appreciates above-average humidity. Room temperature (65–80 °F / 18–27 °C) is generally ideal.
They actually prefer the warmer end of that range; temperatures around 70–75 °F (21–24 °C) are great for active growth. It can handle heat up to the mid-80s (around 30 °C) just fine, especially if humidity is adequate, but avoid extreme heat above that.
Never let your false aralia get too cold. Temperatures consistently below ~60 °F (15 °C) can cause problems – chills may make the plant drop its leaves or even die back. For this reason, ensure even winter nighttime temps stay above 60 °F (around 16 °C) to be safe.
False aralia really struggles below 55 °F (13 °C); leaves will suffer and drop off. Brief dips into the 50s or even high 40s °F (around 8–10 °C) might be tolerated if they’re very short, but prolonged cold is often fatal.
So keep your plant away from drafty windows or doors during winter, and avoid placing it near air conditioning vents. Sudden temperature changes can shock it, so consistency is best.
Humidity: False aralia loves humidity and will be happiest if the relative humidity is 50% or higher. In many homes, especially in winter with the heater on, the air can be quite dry (often 20–30% humidity), which is not ideal for this plant.
In dry air, you might see leaf edges crisping or more leaf drop. To boost humidity around your plant, you have a few options:
- Misting
 Lightly mist the leaves with water a few times a week. This provides a short-lived humidity boost and also helps keep the foliage dust-free.
(Note: While misting alone isn’t a cure-all for low humidity, it does offer brief relief and cleaning. It won’t raise whole-room humidity, but the plant will enjoy the fine water droplets on its leaves in moderation.) - Pebble tray
 Place the pot on a tray filled with pebbles and water (ensure the bottom of the pot sits on the pebbles above the water line, not directly in water).
As the water in the tray evaporates, it creates a humid micro-climate around the plant. This is an easy, passive way to increase local humidity. - Humidifier
 Using a small room humidifier near your plant is one of the most effective methods. Aim it such that the false aralia receives the humidified air. Keep humidity >50% if possible; even better if you can maintain 60-70% around the plant for lush growth.
 - Group your plants
 Clustering houseplants together can naturally raise humidity, as plants release moisture from their leaves (transpiration). A group of plants creates a slightly more humid pocket of air among them, to everyone’s benefit.
 - Choose a humid spot
 If feasible, you can keep your false aralia in a naturally more humid room like a bathroom (with a window for light) or kitchen area. Just make sure it still gets adequate light.
Monitor the plant for signs of humidity stress. Crispy brown leaf edges or tips can indicate the air is too dry. If you notice that, step up your humidity efforts.
Conversely, in very humid conditions with poor airflow, be watchful for fungal issues (like powdery mildew) – good ventilation is important too. Generally, false aralia will reward you for higher humidity by producing larger, healthier leaves and less leaf drop.
In summary, warm + humid = happy false aralia. Keep it in a cozy environment and avoid cold drafts or arid air, and your plant will maintain its beautiful foliage year-round.
Fertilizing Routine and Type

False aralia is not a particularly heavy feeder, but regular, light fertilization during the growing season will support its health and growth. During spring and summer (its active growth period), feeding your plant about every 2–4 weeks is beneficial.
A balanced, all-purpose liquid houseplant fertilizer works well. You can use a general balanced formula (like 10-10-10 or 20-20-20) at about half the recommended strength.
For example, many growers will dilute the fertilizer in water to half-strength and apply it once a month, or even every other week for a very dilute feeding.
If you prefer, you can also use slow-release fertilizer granules mixed into the topsoil in spring – those will feed the plant gradually for several months. However, liquid feeding lets you more precisely control when and how much the plant gets.
Because false aralia is slow-growing, it does not need heavy doses of fertilizer. In fact, over-fertilizing can do more harm than good (causing burnt leaf edges or salt buildup in the soil).
When in doubt, under-feed rather than over-feed. Watch your plant’s response: if the new leaves are coming in pale or growth seems stalled even in summer, it might appreciate a bit more nutrients. If it’s growing steadily, you can stick to a modest feeding routine.
Some sources note that false aralias may drop leaves or grow poorly if kept on a nutrient-starved diet for a long time. Feeding keeps them vigorous and less susceptible to stress.
Fertilizer type

Use a standard houseplant fertilizer (liquid or water-soluble powder). A balanced N-P-K ratio is fine, or you can choose a formulation slightly higher in nitrogen to support foliage, since this is a foliage plant (for instance, a 3-1-2 ratio fertilizer).
Follow the product instructions for dilution. Always fertilize on moist soil – it’s best to water the plant first, then apply the fertilizer solution, to avoid “burning” dry roots. Also make sure the soil drains a bit so excess fertilizer doesn’t accumulate.
False aralia’s roots can be sensitive to fertilizer salts, so flushing the pot with plain water occasionally (letting water run through the soil and drain out) helps prevent buildup.
Frequency: In spring and summer, feed about once a month at half-strength, or even bi-weekly at quarter-strength for a more continuous gentle supply. In fall, as growth slows, reduce feeding to maybe once every 6–8 weeks.
Do not fertilize in winter when the plant is resting (roughly late fall through late winter). During these cooler, low-light months, the plant isn’t using much nutrients, and fertilizing can cause more harm (or just waste, as unused fertilizer can accumulate).
Resume a normal feeding schedule in spring when you see new growth starting. If you’ve recently repotted into fresh potting mix, remember that new potting soil often contains some slow-release nutrients – in that case, you can wait 6-8 weeks after repotting before starting fertilization.
Overall, a light but consistent feeding routine will keep your false aralia’s foliage healthy and encourage steady growth.
With a good fertilizer routine and proper light and water, you’ll notice strong, deep green new leaves and a more robust plant. Just err on the side of caution: it’s far easier to add a bit more fertilizer later than to fix a plant that’s been overfed.
False Aralia Plant Care: Pruning and Shaping
False aralia has a naturally slender, upright growth habit and typically does not branch much on its own. Over time, it may drop its lower leaves, resulting in a palm-like or tree-like appearance with a bare stem and foliage concentrated near the top.
This is normal as the plant matures. If you prefer a bushy, fuller look, you’ll need to prune and shape your plant deliberately. The good news is that false aralia tolerates pruning well and is generally easy to shape with a bit of patience.
How to prune

Because it’s a slow grower, false aralia doesn’t require frequent pruning. Plan to prune mainly to control height, encourage branching, or remove dead foliage. The best time to do any significant pruning is in spring, at the start of the growing season.
Use clean, sharp pruning shears or scissors to prevent infection. You can pinch or snip off the growing tips of stems – this often encourages the plant to produce side shoots and a bushier form.
If your plant is getting too tall or leggy, feel free to cut back the stems to a lower height. Make your cuts just above a leaf node (the point where a leaf is attached), as new growth can sprout from that node.
For a false aralia that has lost many leaves and become bare (“stalky”), a hard prune can rejuvenate it. Don’t be afraid to cut the stems way back (to about 4–6 inches / ~10 cm tall) if necessary – the plant can sprout new shoots from the old wood after a generous pruning.
In fact, false aralia can respond to a hard cut-back by sending out fresh growth, effectively giving you a fuller, shorter plant once it reshoots.
Always leave a few leaf nodes on each stem if possible, since completely leafless stems might struggle to push out growth. And remember to sterilize your cutting tool (with rubbing alcohol or similar) before and after pruning to keep things sanitary.
Shaping tips

If your goal is a bushier false aralia, regular light pruning is the way to go. You could trim the tips of each stem once a year in spring to encourage multiple new branches. This will gradually create a more shrub-like plant.
Alternatively (or additionally), some growers plant 2–3 false aralia in the same pot to achieve immediate bushiness. Since they don’t branch naturally, having multiple stems can give the appearance of a fuller plant.
This is often how nurseries produce a lush look – by potting several young plants together. You can mimic this by propagating a couple of cuttings (or buying a second small plant) and growing them together in one container.
Always remove any dead, yellow, or damaged leaves whenever you notice them. Not only does this improve appearance, it also prevents decaying plant matter from attracting pests or disease.
When removing leaves, either snip them off or gently pull them if they detach easily, but avoid tearing the main stem. Also, never cut into yellowed or diseased tissue on the stem – cut slightly above it into healthy tissue to avoid spreading any issue.
False aralia’s wood is somewhat soft, so make clean cuts without crushing the stems. After pruning, you might notice the plant focuses on root or shoot development and could pause leaf growth for a short time – this is normal as it reallocates energy.
Within a few weeks, new buds should appear below your cut points, especially in spring or summer.
Overall, pruning needs are minimal: if you like the taller, tree-like look, you can practically leave it alone aside from removing the occasional yellow leaf. If you want a shorter, fuller plant, a yearly trim will do the trick.
Regular light pruning or tip pinching keeps your false aralia compact and encourages that lovely, full foliage. And as a bonus, any healthy stem pieces you cut off can potentially be used for propagation (more on that next!).
Repotting Guidelines for False Aralia Plant

False aralia has a moderate root system and grows slowly, so it does not need frequent repotting. In fact, this plant is content being a bit root-bound and can stay in the same pot for a couple of years before needing more space.
As long as it’s healthy, plan on repotting about once every two years. The prime time to repot is spring or early summer, when the plant is entering its growth phase and can recover fastest.
Repotting in spring also gives it fresh nutrients from new soil just when it’s gearing up to put out new leaves.
When to repot: Telltale signs that your false aralia needs repotting include roots poking out of the drainage holes, roots circling and becoming pot-bound, or the soil becoming so depleted that it dries out very quickly after watering.
If you carefully slide the plant out of its pot and see a dense web of roots around the outside of the soil mass, it’s likely time for a larger container.
Another sign is if the plant seems to have stalled in growth and you haven’t refreshed its soil in a long time. Generally though, with slow growers like this, once every 2 years is a good schedule.
Choosing a new pot: Go up only one pot size (about 2 inches (5 cm) larger in diameter) from the current pot. For example, if it’s in a 6-inch pot now, move to an 8-inch pot. Using an excessively large pot can lead to excess soil that stays wet.
Ensure the new pot has excellent drainage (multiple holes if possible). As mentioned earlier, unglazed clay pots help with evaporation, but any pot is fine if you adjust watering accordingly.
If you prefer to keep the plant at its current size and not let it get much bigger, you can actually reuse the same pot: simply prune back some roots (by about 1/3) and refresh the soil around them (this is an advanced technique called root pruning).
This allows you to control its size while still giving it fresh soil. Otherwise, upsizing the pot will likely encourage some new growth.
How to repot: Here’s a straightforward step-by-step:
- Water the plant a day before repotting. Damp soil will hold together better and reduce root stress.
- Gently slide the plant out of its pot. You may need to tap the sides or squeeze a plastic pot to loosen it. Support the base of the plant as you do this.
- Examine the roots. If there are any rotten, mushy roots (often from overwatering issues), trim those off. Healthy roots are light in color and firm.
- If the roots are very dense, you can tease them apart a little with your fingers to encourage them to grow outward into the new soil. Be careful not to break too many.
- Prepare the new pot: place a bit of fresh potting mix in the bottom (and your drainage layer if using one). Aim such that when the root ball is placed in, the top of the root ball will sit about an inch below the rim of the pot.
- Set the plant in the new pot, centered. Add fresh potting mix around the sides, filling in the space. Use your fingers or a stick to press soil gently into any gaps, making sure there are no large air pockets around the roots.
- Do not bury the stem deeper than it was before – keep the same soil level against the stem.
- Once filled, firm the soil lightly so the plant is stable (don’t pack it overly tight; roots like some air space).
- Water the plant thoroughly after repotting. This helps settle the new soil around the roots. You may notice the soil level drop a bit – you can top it up if needed.
- Place the repotted false aralia back in bright indirect light and keep the soil slightly on the drier side for a couple weeks.
The plant might experience a bit of transplant shock, so high humidity and gentle care (no direct sun, no fertilizing for 4-6 weeks) will help it adjust.
After repotting, it’s normal if the plant appears a bit droopy or “out of sorts” for a week or two. Give it time – within 2–4 weeks, it should regain its vigor and may even start to put out new growth once it settles in.
Avoid repotting in the middle of winter unless absolutely necessary (like an emergency repot due to root rot), since the plant will recover more slowly out of season. If you do have to repot in a non-ideal time, just be extra gentle and provide a warm, humid environment for recovery.
One more thing: because false aralia doesn’t need frequent upsizing, you should still refresh the top layer of soil annually. Each spring, you can scrape away the top inch of old soil and replace it with fresh potting mix (this is called top-dressing).
This gives a nutrient boost without full repotting and is great for plants that have reached a large pot size. Overall, repotting every couple of years with fresh soil will ensure your false aralia has room to grow and access to nutrients, keeping it healthy for the long term.
Propagation Methods

Propagating false aralia can be a rewarding but somewhat challenging endeavor. This plant isn’t the easiest for beginners to propagate, but with patience it’s possible to grow new plants from it.
The two main methods are stem cuttings and air layering. It can also be grown from seeds, though seeds are rarely available and tricky to germinate at home.
Difficulty note: Many gardeners find that false aralia cuttings are slow to root and have a low success rate without special care. Don’t be discouraged – just be prepared that not every attempt will take, and it may take a few months to see results.
In fact, commercial growers often propagate this plant by seed or with professional equipment (like misting propagation beds or bottom-heating) to achieve better success.
If you’re new to propagation, manage your expectations and consider propagation a fun experiment. It might be easier to simply purchase another plant, but if you’d like to try, here’s how:
Stem Cuttings (Tip Cuttings)

When: The best time to take cuttings is spring or early summer, when the plant is gearing up for active growth.
Choose a healthy stem that is semi-ripe – meaning it’s firm (not just new soft green growth) but not fully woody. Stems that are a bit thicker than a pencil and have at least a few leaves are ideal.
How: With clean, sharp pruners, cut a 4–6 inch (10–15 cm) section of stem just below a leaf node (the node is where a leaf attaches, and it’s where new roots are most likely to form). It’s often recommended that each cutting have only one or two leaves left on it.
You should remove the lower leaves, especially any that would be buried in soil, because leaving too much foliage can cause the cutting to lose moisture or rot. If the remaining leaves are large, you can even cut them in half to reduce surface area and water loss.
Optionally, dip the cut end in rooting hormone powder or gel. False aralia is a bit finicky, so rooting hormone can improve your chances by encouraging quicker root development.
Planting the cutting.

Prepare a small pot with a well-draining propagation mix – something like half peat moss (or coco coir) and half perlite/sand works well. Moisten the mix (not soggy, just lightly moist).
Stick the cutting into the soil so that the node where you made the cut is buried an inch or two under the soil.
Ensure at least one leaf node is under the soil, as that is where roots should emerge. You can put multiple cuttings in one pot initially if space allows, just give them a bit of separation. Firm the soil around each cutting so it stands upright.
Environment

This part is critical – the cuttings need high humidity and warmth to root. You’re trying to simulate a mini greenhouse. Cover the pot with a clear plastic bag or plastic dome to hold humidity (ensure the plastic doesn’t touch the leaves; prop it up with sticks if needed).
Keep the cuttings in bright, indirect light (no direct sun, which would overheat under the plastic). Aim for a temperature of around 75 °F (24 °C) if possible, especially at the soil level.
Bottom heat can help – if you have a heat mat for seedlings, place the pot on that to gently warm the soil. The humidity under the cover should ideally be very high (even 90-100% relative humidity), so if you see condensation inside, that’s good.
Check the cuttings periodically – keep the soil moist but not soggy. If you notice mold or rot, you might be overwatering or the environment might be too stagnant; occasionally lift the cover to let in fresh air. It often takes several weeks to a few months for roots to form.
Be patient – new growth on top is usually the first sign that rooting has succeeded. You can also gently tug on a cutting after a month or so to feel if it has resistance (indicating roots).
Once you see new leaves or significant root development, you can transplant each cutting to its own pot of regular potting mix.
Summary for cuttings: It’s like giving your plant a chance to clone itself. Many people have success with cuttings by maintaining constant moisture, high humidity, and warmth – like treating it as a tropical baby.
Success is not guaranteed (false aralia cuttings do fail frequently), but even one or two successes out of a batch is a win!
Air Layering

For a larger false aralia that has gotten tall or leggy, air layering is an excellent propagation method that yields a well-rooted new plant while still attached to the parent. It’s a bit more advanced and requires patience, but it often has a higher success rate for difficult-to-root plants.
How: Select a section of stem where you’d like new roots to form – typically a midpoint on a tall stem, below a node. Wound the stem by making a small upward cut or removing a strip of bark around the stem (a technique called girdling).
The cut should go about halfway through the stem. Dust the wound with rooting hormone. Then pack moist sphagnum moss around the wound and wrap it with plastic wrap, sealing the moss around the cut section of stem (you can tie the ends with twist ties or string). This moss pack should be kept moist over time (you can unwrap and mist it occasionally if it starts drying).
Over the course of a few weeks to months, roots should begin to form in the moss where the wound was. You’ll actually see roots through the plastic if it’s clear. Once a good amount of roots have developed, you can cut the stem below those new roots and pot up the rooted top section. This way, you get a new plant that is larger from the get-go, and you avoid the high failure risk of an unrooted cutting. Meanwhile, the leftover bottom stub of the original plant may resprout as well.
Seed propagation

If you ever come across seeds (perhaps from a mature plant’s berries, though false aralia rarely flowers indoors), you can try sowing them in a warm (75 °F / 24 °C), moist environment. Use a seedling tray with a very light, well-draining mix. Fresh seeds germinate best.
Keep them covered for humidity and provide bottom heat if possible. Germination can be slow and variable. This method is uncommon for hobby growers, but it’s out there. Realistically, most folks will propagate via cuttings or layering rather than seeds.
Recommendation: If you’re a beginner, you might try taking a couple of stem cuttings as a test, but don’t be too disappointed if they don’t take root – false aralia is considered moderate to difficult to propagate without controlled conditions.
Air layering is a safer bet for an important plant that you don’t want to risk losing. And of course, the simplest way to get another false aralia is to purchase one, which professionals have already started for you.
But for the adventurous plant parent, propagation attempts can be a fun project. Just remember to keep the propagating cuttings in high humidity, warm temperatures, and bright indirect light, and be patient – roots and new growth take time.
Common Pests and How to Treat Them
False aralia is not massively prone to pests, but like most indoor plants it can occasionally fall victim to a few common houseplant pests. The culprits to watch for are spider mites, mealybugs, scale insects, and aphids.
Pests often strike a stressed plant, so keeping your false aralia healthy (proper light, water, humidity) is the best prevention. Let’s go through these pests and how to address them:
- Spider mites
 These tiny sap-suckers are perhaps the most common issue for false aralias, especially in dry indoor air.
They’re hard to see at first, but telltale signs include fine webbing under leaves or between stems, and speckled, yellowish spots on leaves (caused by mites sucking out the juices).
If leaves look stippled or dusty with little brownish dots, check the undersides with a magnifying glass – you might spot the mites.
Treatment: Isolate the plant to prevent spread. Rinse the foliage thoroughly with water – you can even take it to the shower or sink and spray off as many mites as possible.
Follow up by wiping leaves (especially undersides) with a cloth soaked in insecticidal soap, or spray the plant with insecticidal soap or neem oil. Make sure to get into crevices and leaf undersides.
Because spider mites reproduce quickly, repeat treatment weekly for a few weeks. Increasing humidity around the plant also deters spider mites (they thrive in dry conditions), so regular misting or a humidifier can help prevent re-infestation.
Keep monitoring – if you still see webs or speckles, continue treatment until they’re gone.
Note: Spider mites can be persistent; sometimes multiple rounds of neem oil or even a miticide are needed for severe infestations. Catching them early is key. - Mealybugs
 These appear as white, cottony tufts on stems, leaf joints, or undersides of leaves. They’re soft-bodied insects that suck plant sap and excrete sticky “honeydew.” You might notice sticky residue or black sooty mold forming on that residue.
Treatment: Mealybugs are a bit easier to spot and treat manually. Use a cotton swab dipped in rubbing alcohol to dab and remove each mealybug – the alcohol dissolves their protective coating and kills them on contact. Wipe down affected areas of the plant.
For a larger infestation, apply insecticidal soap or neem oil over the entire plant, making sure to drench the hiding spots where mealybugs cluster.
Check neighboring plants too, since mealybugs can crawl between pots. Repeat weekly until no signs remain.
Consistency is important because mealybugs can hide in nooks (like where leaves meet stems), so inspect carefully. Keep the plant isolated during treatment. - Scale insects
 Scale might show up as small, brown or tan bumps on the stems or underside of leaves. These bumps are actually the shell-like coverings of the insects.
They also produce sticky honeydew. Scale can sometimes be scraped off with a fingernail or an old toothbrush.
Treatment: For a light infestation, physically remove the scales by gently scraping or picking them off. Wiping with alcohol on a cloth or swab helps loosen them.
For a heavier infestation, use a horticultural oil or neem oil – these smother the scale insects. Multiple applications (every 1-2 weeks) may be needed, as scale can be stubborn.
Ensure to treat the stems thoroughly, as that’s where scale often congregates. Monitoring is important; even after you think they’re gone, check every few weeks for any juveniles you might have missed. - Aphids
 These are small green, black, or gray soft-bodied insects that often cluster on new growth or the undersides of tender leaves.
They suck sap and can cause deformed new leaves or wilting. Aphids are less common indoors unless you introduced them via another plant or fresh produce, but they can appear.
Treatment: Similar to mealybugs, you can wash them off with water or wipe with soapy water. Insecticidal soap spray is very effective for aphids – coat the plant, especially growing tips and undersides, to kill them.
Ladybugs love to eat aphids, but indoors that’s usually not practical! So manual or chemical removal is best. Luckily, aphids are usually easier to control than some other pests.
General pest management tips: Always isolate a pest-infested plant from your other houseplants to prevent pests from spreading.
Keep a close eye on your false aralia when watering or dusting, so you catch any issue early. Many pests multiply quickly, so early detection makes treatment much easier.
You can also spray your plant down with water occasionally as a preventative – a gentle shower will knock off any potential hitchhikers. Ensuring good humidity and regularly cleaning the leaves can also make the environment less hospitable to pests (and helps you notice them sooner).
If you prefer natural remedies, neem oil is a good broad solution: it’s organic and works against a range of pests by disrupting their life cycle. Follow the product instructions to mix and spray. Insecticidal soaps are also generally safe and effective if used correctly.
For severe infestations that don’t respond to these, you might need a stronger systemic insecticide, but that’s rarely necessary if you keep up with the basic treatments.
False aralia can also experience fungal diseases like root rot (from overwatering) or leaf spot (if water sits on leaves in a cold environment). The best defense is proper care: don’t overwater, and provide airflow.
If you see black or brown spots on leaves that are spreading, remove the affected leaves and ensure you’re not keeping the foliage constantly wet.
Powdery mildew (a white powdery fungus) can occur in high humidity with stagnant air – if seen, increase airflow and treat with a fungicide or a milk-water spray. But pests are far more common than diseases in indoor settings.
By inspecting your plant regularly and addressing any invaders promptly, you’ll keep your false aralia pest-free.
A healthy false aralia with shiny, clean leaves in a humid, ventilated environment is less likely to suffer pest problems, so the best approach is preventive care. If pests do pop up, don’t worry – with consistent treatment, your plant should recover well.
Common Issues and Troubleshooting
Even with good care, you might encounter some common issues with false aralia. Most problems manifest through the leaves – they’ll tell you when the plant is unhappy. Below are typical issues, their causes, and how to fix them:
- Leaf Drop
 If your false aralia is losing leaves, especially in large numbers, it’s signaling distress.
Possible causes: One frequent cause is a sudden change in environment – false aralias are sensitive and may drop leaves when moved to a new location or if there’s a big shift in temperature or humidity.
It’s their way of reacting to stress. Another cause is cold drafts or temperatures that are too low (below ~60 °F/16 °C) – chill can make the plant shed leaves quickly.
Underwatering (allowing it to go bone dry) can also cause leaves to dry up and fall, often starting from the bottom.
Overwatering can lead to yellowing leaves that eventually fall off as well, often accompanied by a mushy stem base.
Dry air (low humidity) is another factor – in very dry conditions, false aralia might drop some foliage, particularly if also thirsty.
Solutions: First, consider if anything changed recently – did you move the plant, open a winter window near it, or skip watering for too long?
Address that cause: move the plant away from drafts, increase room temperature if it was too low, or adjust your watering routine.
If you just brought the plant home or moved it, give it time to acclimate; keep conditions stable and it should stop dropping leaves once it adjusts (this could take a few weeks).
Ensure consistent care – water properly (neither over- nor under-water) and boost humidity.
Often, maintaining warmth (65–75 °F) and humidity will halt further leaf drop. Also note, gradual loss of the lowest leaves over time is normal – as the plant grows taller, it may shed some older bottom leaves.
If you want to maintain bushiness, occasional pruning as mentioned can counteract this. - Yellowing Leaves
 A leaf that turns solid yellow (not just the occasional old leaf) usually points to overwatering or poor drainage. Consistently wet soil starves roots of oxygen, causing leaves to yellow and drop.
Yellow leaves can also result from nutrient deficiencies if the plant hasn’t been fed in a long time, but in false aralia, overwatering is the more common culprit.
Solutions: Check the soil moisture and the roots if possible. If you suspect overwatering, let the soil dry out more between waterings.
Make sure the pot isn’t sitting in water and that your soil drains well. If the soil smells sour or you find root rot (brown, mushy roots), you may need to repot into fresh, dry soil, trimming off rotten roots in the process.
Improve drainage by adding perlite or ensuring the pot’s holes are not blocked. After correcting the watering, the plant should stop yellowing. New growth should be healthy green.
Remove any fully yellow leaves – they won’t turn green again, and removing them directs energy to healthier parts. Resuming a light feeding schedule can help if you suspect a nutrient issue, but always fix watering first if that’s a possibility. - Brown or Crispy Leaf Edges
 When the leaf edges or tips turn brown and dry, the likely cause is low humidity or underwatering. False aralia’s thin leaves can crisp up if the air is too dry (common in homes during winter) or if it’s not getting enough water overall.
Another cause can be salt build-up from over-fertilizing, which can scorch tips (if you fertilize a lot, consider flushing the soil).
Solutions: Increase humidity (use methods discussed earlier: humidifier, pebble tray, misting). Check your watering – make sure you’re not letting it go completely parched. If only the very tips are brown, you can trim them off for appearance.
If edges are brown, those leaves won’t recover that green tissue, but preventing further damage is the goal.
Ensure you’re not giving fertilizer too frequently or at too high a concentration; if you suspect that, flush the soil with clean water to wash out excess salts.
Also, heat or direct sun can cause leaf burn that looks like brown patches or edges. If the plant was in hot direct sun, move it to indirect light. - Leaves Turning Black or Brown (large patches)
Large dark patches can indicate scorch from too much direct sunlight or intense heat. False aralia leaves are thin and can literally get sunburned if abruptly exposed to strong sun.
Another possible reason is extreme cold damage, but that usually causes total collapse rather than black patches.
Solutions: If you suspect sunburn, relocate the plant to a less intense light spot (bright indirect light is best). The damaged leaves won’t heal, so you may prune them off if they’re unsightly.
New growth should emerge normal once the light is corrected. Always introduce your plant gradually to brighter light to avoid shock (don’t move it from a dim corner straight to a sunny window overnight). - Leggy or Sparse Growth
 If the plant is tall with long stretches of bare stem and fewer leaves at the top, it’s either aging normally (dropping lower leaves) or not getting quite enough light, which causes it to stretch out. Also, lack of pruning can mean it just continued upward without branching.
Solutions: For an older plant, it might be time to prune it back to encourage fresh, bushier growth lower down. Don’t be afraid to cut stems shorter – this can prompt new shoots along the stem.
To prevent a young plant from getting leggy, ensure it gets enough light (insufficient light is a common cause of spindly growth) and consider pinching the tips to encourage branching early on.
If the plant is simply one stem and you prefer fullness, you could propagate top cuttings and replant them together, or as mentioned, plant multiple false aralias in one pot for a fuller look.
Adequate light, a bit of pruning, and rotation of the plant (so all sides get light) will help maintain a more uniform, full appearance. - Drooping Leaves
 When the whole plant’s leaves are wilted or drooping (limp), the most likely cause is thirst – the plant is too dry. False aralia tends to droop when it badly needs water, and it usually perks up after a good watering.
Less commonly, a plant can droop from severe overwatering (root rot means it can’t take up water, so it wilts) – but then leaves often yellow or brown too.
Solutions: Check the soil. If it’s bone dry and the plant is drooping, a thorough watering should revive it within 24 hours. If the soil is wet and it’s drooping, you might have root rot – gently unpot and inspect roots, trim rotten parts, and repot into fresh dry mix.
But usually, droop = dry. To avoid getting to that point, try not to let the soil completely dry to the point of the plant collapsing. - Slow or No Growth: False aralia is naturally slow-growing, but if it’s the growing season and you see no new growth at all for months, consider the conditions.
Possible causes: Not enough light, not enough nutrients, or the roots are out of space. Also, remember false aralia does pause growth in winter – it’s normal to see little to no growth in the colder months.
Solutions: If it’s winter, just wait for spring. If it’s summer, try increasing light exposure (without adding direct sun that might burn it). Even moving it from medium to bright indirect light can spur more growth.
Ensure you’re feeding it occasionally in spring/summer – a nutrient-deprived plant won’t have energy to grow. Check if it’s rootbound; if the pot is full of roots, repotting could give it a boost. Once conditions are improved, you should see some new leaves unfurl.
If you address the above factors and your false aralia still seems unhappy, consider if any less common issues might be at play.
Occasionally, disease (like root rot or fungal leaf spots) could be an issue – root rot is fixed by repotting and better watering habits, leaf spot can be managed by removing affected leaves and avoiding water sitting on foliage.
Pest damage can also cause generalized decline – always do a pest check if things aren’t adding up.
In summary, most problems trace back to improper water, light, or temperature/humidity. Yellow leaves? Often too much water. Brown crispy leaves? Likely dry air or too much sun. Falling leaves? Check for cold drafts or recent changes.
When you see an issue, try to correct the underlying care aspect, and your plant should recover. False aralia can be a bit dramatic in dropping leaves when disturbed, but once it’s in a happy spot and routine, it generally settles and remains attractive.
Don’t panic if it loses a few leaves; just double-check its care. New growth will replace old leaves as conditions improve. With attentive care, you’ll learn your plant’s signals and keep it thriving.
Toxicity Information (Pets and Children)
If you have curious pets or young children, it’s important to note that false aralia is considered toxic if ingested. All parts of the plant (leaves, stems, etc.) contain substances that can cause gastrointestinal upset.
Ingestion can lead to symptoms like vomiting, nausea, and loss of appetite. The plant is specifically known to be poisonous to cats and dogs, as well as to people if enough is eaten.
Fortunately, the plant is not particularly palatable – it’s unlikely a child or pet would eat a large amount because the leaves are tough and not tasty, but even a small nibble can cause drooling and stomach pain in pets.
The toxic principle in false aralia isn’t widely publicized, but many Araliaceae family members (like the related schefflera/umbrella plant) contain calcium oxalate crystals or other irritants that cause oral and digestive irritation.
Symptoms in pets may include pawing at the mouth, drooling, vomiting, or difficulty swallowing if a large piece was chewed. In humans, if someone were to chew the plant, they might experience a burning sensation and throat irritation.
Precautions: It’s best to keep this plant out of reach of pets and children. Place it on a shelf, plant stand, or area that pets can’t easily get to.
Cats are notorious for climbing, so consider hanging planters or a protective barrier if needed. If you notice bite marks on the leaves, take it as a warning and relocate the plant to a safer spot immediately.
You may also educate children that this (and really all houseplants not known to be edible) are “not food.”
When handling the plant for pruning or repotting, some experts even suggest wearing gloves. The sap or juices might cause mild skin irritation in sensitive individuals, so if you have sensitive skin, gloves are a good idea.
At least wash your hands after handling the plant, especially before eating or touching your face.
In case of ingestion: If a pet chews on false aralia, observe them closely. Wipe out any plant matter from their mouth and offer water or something to drink.
Then call your veterinarian for advice – they may recommend bringing the pet in, or they might suggest monitoring at home if symptoms are mild. For children, if a small piece was swallowed, rinse the mouth, have them spit out any remaining bits, and give water or milk to drink.
Then call your local poison control center or seek medical advice. Serious poisonings are rare (it’s not highly deadly or anything), but you’ll want to manage discomfort and ensure the person/pet stays okay.
In summary, false aralia is a beauty to admire, not to ingest. Treat it like you would a decorative plant with toxins – keep it in a safe place. The plant’s label of “not intended for human or animal consumption” is one to heed.
By being mindful of its placement and handling, you can enjoy this lovely plant safely in your home. If you have very mischievous pets (like cats that chew everything), you might opt for keeping the plant in a room the pets can’t access or reconsider having this plant. Otherwise, simple precautions will ensure everyone coexists peacefully.
Additional Tips for Success
- Consistency is key: False aralia thrives on steady conditions. Try to avoid sudden changes in temperature, light, or humidity.
When you bring a new plant home, acclimate it gradually – place it where you intend to keep it and then maintain a consistent care routine. The plant might shed a few leaves as it adjusts, but keeping conditions stable will minimize this. - Clean the leaves
 With so many narrow leaves, dust can collect over time and impede photosynthesis. Every few weeks, dust off the foliage. You can gently wipe leaves with a damp soft cloth.
Another method is to mist the plant and lightly stroke the leaves with your fingers to dislodge dust (or give it a lukewarm shower in the bathtub). Clean leaves not only look nicer but also ensure the plant can absorb light efficiently.
As a bonus, regular cleaning lets you inspect for pests or issues early. Some plant owners use a tiny bit of diluted olive oil soap or neem solution on a cloth to both clean and keep pests away – if you do, make sure to wipe off any residue with a clean damp cloth after. - Rotate the plant
 To encourage even, symmetrical growth, rotate your false aralia about a quarter turn every week or two. This way, all sides get their moment facing the light source, and your plant won’t lean to one side. It will develop a balanced shape instead of lopsided.
 - Provide support if needed
 A very tall false aralia (over a few feet) might become a bit top-heavy or have a thin trunk that could wobble. If yours is very large and seems unsteady, you can use a stake to support the main stem.
Tie it loosely with soft plant ties or twine. Generally, they have sturdy woody stems as they age, but indoors if light is a bit lower, stems can be thinner. Staking prevents accidents (like it tipping over or snapping). - Mind the pot placement: Because false aralia likes humidity, avoid placing it directly next to heating vents or radiators which dry the air. Also keep it away from frequently opened exterior doors in winter to prevent cold drafts.
If you summer your plant outdoors (only if you live in a warm area), remember to bring it back inside well before temperatures drop in autumn
. - Companion planting
 False aralia’s aesthetic pairs well with other tropical houseplants. Feel free to group it with broader-leaved plants (like Monsteras or Philodendrons) for visual contrast.
Just ensure it’s not shaded by them – it still needs its share of light. Grouping plants also helps maintain humidity, as mentioned. - Watch for growth spurts
 Though slow, your plant might surprise you with a burst of growth in optimal conditions. During these times, keep up with water and nutrients, as the plant will use more. Conversely, in dormant periods, ease off to avoid overdoing it.
 - Enjoy its air-purifying quality: Like many green houseplants, false aralia can help clean indoor air by filtering some toxins (according to some studies).
While the impact is small in normal home settings, it’s still a nice perk of having greenery around. In any case, its presence can improve mood and give a room a relaxing, natural vibe. - Patience and observation: Every false aralia can have its own “personality.” Pay attention to how yours responds.
You might find it needs water a bit more or less frequently than guidelines, or that it prefers a slightly different spot. Over time, you’ll get in tune with your plant.
Patience is important – remember, this plant is elegantissima, not fastissima! It takes its time to grow. Avoid the urge to fuss with it too much if it’s doing well; sometimes less is more.
By following the care guidance above and these extra tips, you’ll set yourself up for success. Many people find false aralia becomes a long-term resident in their plant collection, gracing their home with beautiful foliage for years. With attention and care, your false aralia will reward you with its unique, lush appearance and be a source of pride for any plant parent.
Summary and Quick Tips
- Light: Bright, indirect light is ideal. Protect from harsh direct sun to avoid leaf scorch. In medium light it will survive but grow more slowly. Rotate the plant periodically for even light exposure.
- Water: Water when the top inch of soil is dry. Keep soil lightly moist but never waterlogged. Drain off excess water to prevent root rot. In general, it’s safer to under-water slightly than over-water. Water less in winter, but don’t let it dry out completely.
- Soil: Use a well-draining potting mix rich in organic matter (peat-based mixes work well). Ensure good drainage with perlite/sand added. A slightly acidic pH (6.0–6.5) is preferred. Always pot in a container with drainage holes.
- Temperature: Warm indoor temperatures of 65–80 °F (18–27 °C) are perfect. Keep above 60 °F (16 °C) at all times; false aralia doesn’t tolerate cold. Avoid cold drafts and rapid temperature changes.
- Humidity: Prefers moderate to high humidity (50% or more). Boost humidity by misting, humidifier, or pebble tray. Dry air can cause leaf drop or browning edges – aim to keep the environment moist.
- Fertilizer: Feed lightly during spring and summer. Use a diluted liquid houseplant fertilizer about every 2–4 weeks. No fertilization needed in winter. Don’t over-fertilize, as false aralia is a slow grower.
- Pruning: Minimal pruning is needed. Remove yellow or dead leaves. Pinch or trim stems in spring to control height and encourage bushier growth. You can prune heavily if needed – the plant will reshoot from old wood. Always use clean tools.
- Repotting: Repot every 2 years or when root-bound. Use only a slightly larger pot with fresh soil. Best done in spring. False aralia likes being a bit snug, so avoid oversized pots. You can top-dress annually in between repots.
- Propagation: Possible via stem cuttings or air layering, but can be challenging. Take spring tip cuttings with a node, use rooting hormone, and keep in high humidity warmth for best chance. Air layering is more reliable for large plants. Propagation is a slow process – be patient.
- Pests: Watch for spider mites, mealybugs, scale, and aphids. Inspect leaves (especially undersides) regularly. Treat early with insecticidal soap or neem oil if spotted. Keeping humidity up and leaves clean helps prevent infestations.
- Common Problems: Yellow leaves usually mean overwatering; brown crispy edges point to low humidity or underwatering; leaf drop can occur from cold or stress.
Adjust care (water, temperature, humidity) to resolve these issues. False aralia may drop some leaves when adapting to a new location – this is normal, just maintain good care and it will stabilize. - Toxicity: Poisonous if ingested by pets or people. Keep out of reach of cats, dogs, and children. Can cause vomiting and irritation if eaten. Handle plant sap with care – wear gloves when pruning if you have sensitive skin.
By following this guide, you’ll create a comfortable indoor habitat for your false aralia. In return, you’ll get to enjoy its stunning, finger-like foliage and graceful presence in your home.
This plant may require a bit of attention to detail, but it is generally forgiving once established. With proper light, mindful watering, warmth, and a touch of humidity, your false aralia will flourish as a delightful, exotic houseplant for years to come. Happy growing!